Posts

Let's Talk About Non-Metal-Metal (NMM)

Image
A lot of new painters want to jump straight into this advance technique without realising it is built on the foundation of most of the basics along with a couple of intermediate techniques.   The basics being; blending, glazing, layering, colour mixing, contrast, and edge highlighting. The intermediate techniques that help with the advanced ones are: understanding how base coats interact with the paints you put on top, brush control and having a solid understanding of light sources. I certainly would never discourage anyone from having a go, but if you haven’t quite figured out the above, you are setting yourself up to fail. And then get disheartened and probably get fed up, you know how it goes.  You are after all trying to paint an illusion, a ‘trompe l’oeil’ (deceive the eye). You are trying to make a piece of 3d moulded plastic look like a piece of metal, without using metallic paints (paint which has flecks of actual metal in it).  You also have to remember th...

Back to Basics - Gap Filling & Priming 'Vaelia Arra' 75mm

Image
 Following on from my last post you should now be ready for filling any gaps and priming your model.  Vaelia Arra - Copyright White Werewolf Taven I would always recommend dry fitting parts first before gluing, to make sure everything fits properly. With 3D prints, especially the larger ones, they are often multi-part kits, which have all been cured separately and can shrink and move, meaning some joints don't always connect the way they should.  Some joins may need trimming to ensure a good fit so make sure you're happy everything fits before applying the glue. I tend to use a good strong superglue, Gorilla Gel glue works well for me, but you may have something else you prefer. If a join is going to need gap filling, I will tend to leave the glue to dry for an hour or so before I fill any gaps. You don't want the part snapping off whilst you are in the middle of filling any gaps! Resin can be pinned and is recommended if the join isn't that big.  For small gaps I wi...

New Series - Back to Basics & Paint Along 'Vaelia Arra' 75mm

Image
Well, it's been a while since I last posted a blog, about a year I think! But I've been thinking about doing a series for beginners for sometime. Going through from start to finish working on a larger model project. There won't be any special advanced techniques here, just base coat, blending, glazing, layering etc. all the basics to lay the foundation down for those later advance ones. There may be a bit of colour mixing and going back to some of my other tutorials, like painting skin with 4 colours.  The main point of this series is to enable you to jump in at any point - so if you already know how to clean and build models, but just want a hand with painting then just skip ahead! So for this project I have decided to use Vaelia Arra, a 75mm model sculpted by White Werewolf Tavern. If you haven't already go check out their stuff, they do some amazing sculpts! Image copyright White Werewolf Tavern I mainly purchase my 3d prints from Etsy as there are a lot of merchants...

Troggoth Painting Skin Guide

Image
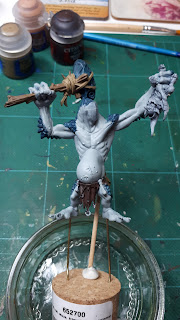
As I am currently unable to get hold of a webcam due to them being snapped up by everyone working from home, I thought I would try and do a blog post on how I paint skin. Following up on my earlier post on the technical side of things with the Sara bust I painted, this is how I go about it.  Using the troggoths that I have been painting recently my process can be summed up in a few steps:  1) lay down a good base coat, in the troggs case, this was Celestial Grey 2) sketch in the shadows     This is probably one of the main steps. As this is where I establish where my shadows and highlights are going to go and will set me up for the rest of the painting.  Using my own mix of Navy Blue ( scale colour), Naggroth Night and Magos Purple, I sketched in where I wanted the shadows to be:  As you can see this stage is pretty messy, as I'm using a very thinned paint in order to establish the values I need on the mini. Don't feel disheartened at this point as you...

Tip #1 - Get To Know Your Paints

Image
I'm hoping to do a series of tips, taken from the do's and don'ts blog I did a little while ago, with the aim of expanding further on them with an in depth look to help new and establish painters. Who knows, they might prove useful to you! Getting to know your paints So, you've just gone out and bought a tonne of paints and want to crack on with your painting. That's great, however... just a word of warning, that red you bought may not be the colour you thought it was. In fact, that red has purple in it and purple isn't what you wanted in your colour scheme.  It may seem like something you wouldn't need to consider but unless you are buying a primary colour, secondary, tertiary colours are made up of lots of other colours. Half the time to me, it just seems like an illusion to appease our eyesight.  Even black can be made up of brown or blue or purple, because those are their core mixtures. White as well, will usually have blue in it because that makes a bri...

Miniature Painting Techniques - Jargon Buster

Following a recent IG conversation with a new painter I thought it might be a good idea to write a post to help those who are new, with some of the technical terms they may come across in their painting journey. I know some of these confused me when I returned from a 15 year hiatus over a year ago.  I'm only going to go over briefly each technique as there is quite a few and other artists on all social media platforms have covered each and everyone of these in greater detail than I need to go into here. So if you find one you want to look into further you need only do an internet search and you will have a vast swathe of resources at your fingertips. So let's begin! ******************************************** Blending - there are several techniques that fall under this main heading, but this is the general term for mixing two or more colours together creating a gradient from one to the other.  Contrast - I think this is probably the most commonly espouse...

Painting Skin With 4 Colours

Image
The skin on this bust was painted using just 4 colours. It was something I found on Pinterest which was a guide on mixing flesh tones, mainly for oils, but I wondered if I could apply the same technique with my acrylic paints. This model was a practice piece anyway so it didn't really matter if my experiment went horribly wrong! The guide does not have any revolutionary new ways of doing things, this is a very commonly used technique.  Basically you take the following paints: Cadmium Red, Yellow Ochre, Ultramarine Blue, Titanium White.  As I do not have these colours in acrylics I then thought what is the closest colours I do have? So I picked Mephiston Red, Averland Sunset and Ceremite White (all GW) and Blue from the Vallejo air range.  The guide recommends the following:  Think in terms of light and shadow Use a limited palette  Mix the main colours first - light flesh and dark flesh Avoid adding white to your shadows (this I found ...