
Back to Basics - Gap Filling & Priming 'Vaelia Arra' 75mm
Following on from my last post you should now be ready for filling any gaps and priming your model.
 |
| Vaelia Arra - Copyright White Werewolf Taven |
I would always recommend dry fitting parts first before gluing, to make sure everything fits properly. With 3D prints, especially the larger ones, they are often multi-part kits, which have all been cured separately and can shrink and move, meaning some joints don't always connect the way they should.
Some joins may need trimming to ensure a good fit so make sure you're happy everything fits before applying the glue. I tend to use a good strong superglue, Gorilla Gel glue works well for me, but you may have something else you prefer. If a join is going to need gap filling, I will tend to leave the glue to dry for an hour or so before I fill any gaps. You don't want the part snapping off whilst you are in the middle of filling any gaps! Resin can be pinned and is recommended if the join isn't that big.
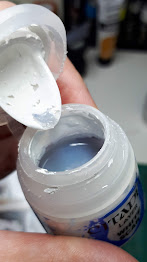
For small gaps I will use Vallejo's Plastic Putty filler. It's white, with the consistency of glue and can be applied with a paint brush. For larger gaps I will use green stuff, the one you mix yellow and blue sides of, and apply with my hands and a small tool. It can be quite sticky so to help with this I use a tiny bit of vaseline.
I did not need any green stuff on Vaelia, the white filler was enough. Bear in mind you may need a couple of applications to get a good coverage.


As you can see here I needed to fill a hole on the back of her skirt, around her arm and neck. Both the latter were separate pieces that were glued on. I left the filler to dry for about a day and then carefully went back and cleared out the excess. I went over the hole on her back a couple more times and a few other gaps and left this to dry before making sure she was ready for priming.


You can see from underneath she is still quite dark and the light is focused from above.
Next is the fun part of choosing our colour scheme! Until then!
Lisa
If you like what I do and would like to support me in making these tutorials, please consider tipping me over at my Ko-Fi account on: https://ko-fi.com/goldfinchminiaturepainting
Please also drop me a follow on Instagram if you don't already: https://www.instagram.com/goldfinch_minis/
Thank you for your support!

Comments
Post a Comment