
Dryad Bust & Grisaille Painting

This gorgeous bust is by Creepytables. I recommend looking at their stuff as they sell high quality miniatures/busts. This lady is insanely detailed and is my first foray into bust painting. I have been wanting to paint something like this for months and have been scouring the internet for models that do not have women sculpted with half their clothes missing (this is a bugbear of mine and a whole other topic for another time/rant).
Having just attempted a hand painted zenithal on my Mistweaver (see post) I wanted to try this again on this model, having since discovered that this is an actual technique! Called Grisaille, which is a form of underpainting. So, I will be doing a Grisaille painting, by blocking in light in grey tones before even going anywhere near it with colour.
My vision for the model is spring greens and the flowers, which to me look like peonies, I want to do quite a light colour with a faded blend of complementary colour to her leaves. I want to also try and do some OSL on the little fruit pods on her dress.
Just one thing to note with these busts because they are so big, she's about 13cms (which is huge compared to the models I normally paint!), I had to employ some old school techniques when gluing her together as she comes in about 9 parts, I've even left two parts of her headdress off that I will stick on later as I won't be able to get to her face if I put them on. By old school I mean dry-fitting first, then painting the joins to look for gaps and also pinning. Superglue does work well (don't bother with 'styrene cement), but pinning adds strength to a weak join. So with her she has pins on the two sections of the skirt, I don't think I used any when pinning the skirt to her body, I may have done, I can't remember and her head had one to connect to her neck and the back of the headdress also had one, as there was hardly any contact with this and the back of her head. Working with resin is very, very different to GW plastic and you have to plan how you are sticking the model together first. I also had to use a lot of green stuff (tip: use vaseline when handling green stuff, you don't get so much stuck to you!) as there were quite a few gaps that needed filling and it needed a bit of work to smooth this down and ensure it doesn't show too much when painting.
 |
| Pins drilled in and glued before fixing both sides together |
Once she was prepared, it was time to paint!
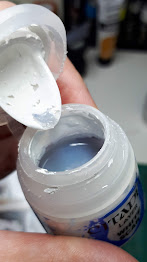
I decided to go with a black base as I want quite a strong contrast on this model so I used Vallejo Air Black, I didn't want anything too shiny or too thick and as it is already watered down it made for a nice base:

After that I needed to lighten up the skin areas as a black base would be too dark. I've just finished the Red Gobbo and I based that with black and it is quite a hard colour to work up from, so maybe I should have done Mechanicus Standard Grey first, but never mind, it's done now.
 |
| With 2 coats of Grey |
For the grey I used GW's Air paint, Mechanicus Standard Grey and even watered this down by quite a bit as I needed to build up the layers very slowly and not end up with a thick layer of paint on the skin. I do have an airbrush but struggle with it as I haven't used it much and the cleaning of it drives me up the wall. The picture above show what she looks like with just 2 layers of paint on and the one below has 6 layers of paint on, as you can see there is now a nice covering on the skin. This could not be achieved in just a couple. It's a slow process but you have to be patient if you want a nice smooth coverage and you are not using an airbrush!


I apologise for the haphazardness of the images, I struggle to get them to line up sometimes. So from here I will probably apply a lighter colour on the skin and make a start on the grisaille on the rest of the model.
27/12/2019
I ended up painting 2 more layers of Mechanicus Standard Grey (A) on the rest of the model as I felt the black was just too dark. After that I made a start on the Grisaille. This was done with the following layers, all heavily watered down, with a size 1 brush:
- Mechanicus Standard Grey & Dawnstone 1:1 mix x 2 layers
- Dawnstone x 1 layer
- Administratum Grey x layer
- Administratum Grey & Ceremite White 2:1 x 1 layer
- Grey Seer 3:1 with Blue Horror and 1 Ceremite White
 |
| Taken before colour was added |
Next, start colouring in!
As they are pretty much like washes and inks I decided to use Contrast Paints for the first steps of painting. The smaller leaves on the skirt I imagined to be newer ones, whereas the larger, lower leaves are older ones, kind of how leaves are a deeper green in summer. So for the smaller ones I used Plaguebearer Flesh:


I put 2 layers of this paint on these leaves and those on the bodice of the leaf dress.
Then I used Militarum Green for the larger leaves:


Then for the arm bark and hedgehog spines I used Cygor Brown, the vines and hair Gore-Grunta Fur, the berries and flowers, Magenta from Vallejo. The skin I started off with a wash of Ionrach Skin. My plan with the skin is to use quite desaturated colours to reflect those around her and perhaps at some point in the painting I may do some OSL (object source lighting) as well. Below is where I am with her at the moment:

As a side note unfortunately I won't be doing anything further on this post, sorry, but I kinda of got back into painting her the other week and just motored on and finished her up. At least I hope it might have proved useful to see my process with grisaille and using contrast paints and how effective this combo can be. If you need me to explain anything you see here, DM me on either Facebook or Instagram.
Lisa.

Comments
Post a Comment