
Painting Tips

This is something I wanted to do following the #whitebeltpainting created by @agreatguy_paints on Instagram.
This post will mainly focus on preparing for painting competitions, seeing as this is what my main focus is and the area I am trying to work on improving. As and when I think of them as I progress through my paintings.
These will also appear in my stories as a saved highlight (when I get round to it).
So, without further ado...
Painting Tip #1 - plan your colour scheme
- This may seem a little superfluous to the overall painting of your mini, but I always need to have a plan of some sorts in place before I start painting. Even if it's just picking two colours off the colour wheel as a starting point: 'I want the main colour on this mini to be green'.
- If you haven't already, get a colour wheel. Either one you can have in your hand or there are plenty of apps for this.
- Get to grips with a little colour theory. You don't need to go nuts on this, but a little will help you come up with great schemes. Also don't forget to look at Instagram and Pinterest for ideas, both will more than likely have a hashtag or search item for a mini you are currently painting. Just remember, if you like a scheme another artist has done, try it yourself but don't forget to tag the artist who inspired you, they will be happy to have done so.
Painting Tip #2 - clean and prepare your mini
- Always, always, always remove all your mould lines! No amount of paint can ever disguise an ugly mould line! Get rid of them!
- Fill all gaps with either green stuff, liquid green stuff, Vallejo's plastic putty or anything else you favour and always let this dry thoroughly for at least 24hrs before cleaning the areas you've filled. There's nothing more frustrating than trying to carefully scrape away excess green stuff only to have the bit in the gap you filled come away with the rest.
- Give your mini a bath! Paint does not like going onto areas where there is residue oil on the mini from you have been handling it. I am still trying to refine what soap to use yet, as I thought I had recently bathed my Aventis Firestrike only to have the paint from the airbrush pooling like a bitch on the surface, which meant I had to put a scruffy thin layer on for the paint to grip onto. I wasn't happy! It made for a very stressful afternoon.
- Final point after the bath - DO NOT TOUCH IT AGAIN WITH YOUR BARE HANDS! You have naturally oily hands and if, like me, you suffer with dry skin are likely to also have hand cream on your hands too. So wear some rubber/latex gloves when handling your mini.
As a final note, it can take me at least 4-6 hours or more when building and preparing a mini for competition. I am a firm believer in putting the time in to prepare your miniature will help in the long run.
Painting Tip #3 - the base coat
- Either do this with an airbrush, rattle can or thin layers of paint
- Be careful not to flood the mini with the airbrush or rattle can
- If you are doing this by hand, 5 very thin coats of paint are better than 1 thick one!
- Find the base colour you like best. This can take a while if you're starting out. I used to base in black (many, many years ago) but I actually don't like this now as its too dark and I find it hides details. I normally like Mechanicus Standard Grey, but this is a bit difficult when the plastic is the same colour! So I either use Celestra Grey, or a charcoal colour. This is also dependent on what colour scheme you want to use as well. So for a lighter colour scheme it is best to base in a light colour and darker scheme a dark colour. If you are using very thinned down paints this is quite important (see 'Thinning Your Paints' post)
- If you have done a darker base coat you can then go another step along and add either a zenithal or Grisaille, these take time to figure out and there is not point in doing them if you are struggling with thinning your paints, because like I once did you'll just end up painting over it and lose that useful light/shade guide. (see Zenithal & Grisaille post)
Painting Tip #4 - blocking in the colours
- This is probably the messiest stage, which I have a love/hate relationship with and is also where your plan from tip #1 comes into play
- Pick the colours that closely match the scheme you have chosen, just be careful and ensure they are in the same family, this will take time to train your eye, but what I mean by this is whether they are warm colours or cool colours. The way I think about it is if greens, for example, have quite a bit of white (cooler) in them or if they have more yellow (warmer) in them. I will try and cover this in a later post
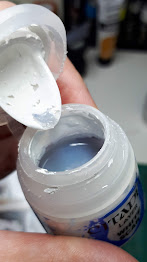
- As a side note, a wet pallet is quite helpful to see what colours paint is actually made up of as they will often separate over night. Mephiston Red was actually one of the first that made me realise this as I saw quite a lot of purple and black in the paint.
N.B. I am writing this post in conjunction with painting my Mindstealer so will update as when needed!

Comments
Post a Comment